Xpan scanning, best practice panorama film scanning
Adjusting the colors of the stitched Xpan raw file
I will show you two ways of doing this task.
1. By importing the raw file back in to Vuescan (Easy)
2. By the use of image editor and curvesLater I might ad a 3rd way (If i get time and get in the mode)
Scan from file, The Vuescan way
Since we made a raw scan in Vuescan and then stitched it together it is now
possible to import this file back in to Vuescan and apply the settings you should
have done if you was scanning a regular slide or film image.
To do this just open Vuescan and select the Input tab then make the correct settings at Source=File.
Then look up your file by hitting the @ button adjacent to the Files:path field.
finally select the Scanner to simulate in the Mode: drop down menu.
You may also try to change media to the filmtype that you have used.
When you are done with the settings in the input menu it is time to make the color
output settings.
Select the Color tab and try to find the setting that make your image look the way you want it to do look.
Remember to hit the Preview button after each change to display the result.
When you are happy with the look go to the Output tab and make settings for the
file output that you want now you may change the output to 24bit to make it
editable in photo editors without 48bit support (Like the nice and free Gimp).Hit the Scan button and admire the result.


Media types to chose from
in the Vuescan input menu
<-

If you chose any of the film
options above, then you
may also make the film
vendor and film type in the
color menu ->

Now it is time to bring the image in to the image editor of your choice to make
the final adjustments and sharpening.

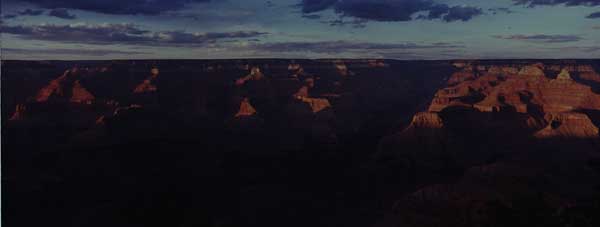
This is hour starting point, the raw scan lets look at it as an undeveloped film

Image above developed by the Vuescan scan from file method no other than a selection of color mode has been done, I selected Landscape in this case the result is promising but more can be done to make it more appealing.

Same image different settings this time I used white balance setting and a bit of an
S curve to give this output.
Further experimenting might have resulted in an even better output and you can
also make several alternative exposures and then blend them together by using
layering in your final image editor.
In this case I would have chosen the first "Landscape mode" image as a starting
point and the tweak it further in Gimp or Photoshop.
Using curves in your photo editor.
This method will be a bit harder to learn and if you intend to make your raw scanning
in 48bit mode you will be forced to use photo editors that ar capable of handling
those files the top of the line Freeware Open source GIMP is not able to do this.If you are using Linux you might try CinePaint that supports 48bit tiff files.
Windows users can chose from Photoshop CS, Photoshop Elements.
I have also ben told that Picture Window Pro 4.0 should be able to cope with
48bit and large files and seams to be a nice tool (I might try it in the future).
OK! lets get on with it.
We start with the same raw scan stitched image we used for the Vuescan method above, open it up in Photoshop Gimp etc and then get to the Curve tool.
In Photoshop it is Image/Adjustments/Curves in Gimp Colors/Curves.
In fact I like the Gimp curve tool best of those two, in gimp you also have the choise
of histogram view in logarytmic or linear mode and in this case the log mode was
helpfull since it shows more information in the highligt section.
I only wish Gimp had suport for 48bit files I hope it gets in the future.


This image belongs to the curve far left (Photoshop) and are
converted/color adjusted from the full 48bit file

This is the result from the Gimp curve above, the image was first coverted
to 24bit file (This is also done automaticaly by Gimp during file import)

Hmmm! This might be the quickest and easiest way to do this kind of stitching!
I tried the output option in Vuescan to produce Adobe RAW DNG files.
I then tried to import the two DNG Xpan half's to Camera raw for stitching (No success)
Well I then tried to import the DNG files directly in to the Automate/Photomerge
function as is, and that worked!
I was not given any kind of chance to interact with the camera raw settings but it
still seems to have done pretty well by it self in the matter of converting to a file
format that Photomerge is able to work with (PSD i assume).The image above has not ben adjusted in any way except for size some USM and
conversion to JPG So this is the colors that came from ACR !
This is the end of this tutorial soooo get on with it :0)