
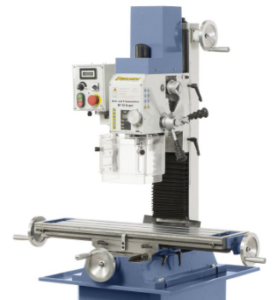
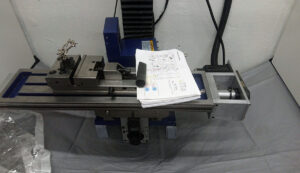
The victim a HBM BF-30MVL bench top vertical mill.
The HBM BF-30MVL variant was chosen because of its 30 Taper spindle that I prefer over the R8 ot MT3 that most other variations are equiped with.
Updated: DEC 18 2023 and alive. Note: some downloadable files at the bottom of this page.
-Timing belts and Ballscrews-
 I want a build that are space saving so thats why I chose belt driven ballscrews, a nice things with belts is that I also easy can change the gearing if I find needs or performance benefits to do so.
And even if you want direct coupled steppers or servos you still need some couplers that can even out the imperfections in the motor to screw coupling, this might be a bellows mebrane or oldham coupling, non of those are perfect nither is the belt drive coupling that I have chosen we all have to take a decission here and I have made mine and do not judge anyone that may chose other ways :D
-AC servos-
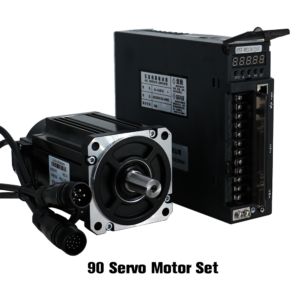
From China, today chinese made and branded AC servos are in the same price group as closed loop steppersmotors today so I went for servos they are covinient since they do not require aditional power supply to run (I know that is also true with some stepper drivers). I have chosen some servos and drives that are nopt realy well documented yet, I have still manged too get them to act pretty much the way I want them to do, some info will be posted downwards this blog and will be updated as I find some new features an/or configurations that might improve the functions I need.
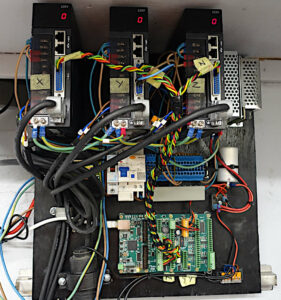
-Controller board and software-
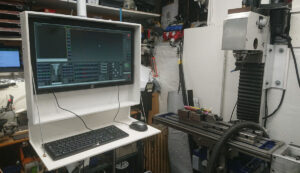
early in my planning stage decided to go for LinuxCNC that is part from a great software under constant development also suported by a friendly and helpfull group of people in the LinuxCNC Forum.
I first started out with an old PC with parallel port and a cheap breakeout board from the same country that I got my servos from but as soon as I found the great LinuxCNC compatible range of MESA Ethernet controller boards I was sold, they are not exactly cheap but not either expensive more like worth it.
-My pile of parts and software-
- LinuxCNC 2.9.1: (Will change this when apropriate and also make notes if config need changes).
- Servo motors: For XYZ: 90ST-M02430 and A1-SVD 15 Servo drivers
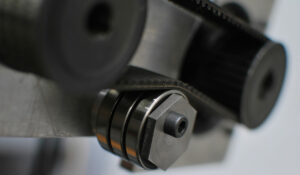
- Ball screws: DFU2005 for XY and DFU 2505 for Z
- Belt drives: For motor to ballscrew coupling XY 30T-30T HDT5M-25
- Belt drive: For motor to ball screw coupling and reduction on Z 30T-60T HDT5M-25
- PC: Old HP G3 Mini Core i5 mini PC + MESA 7i76e
- Miscellaneous tuff: Some NC PNP prox sensors and other small electric and electronic parts (Might mention them later).
I have completed the motor/ballscrew installation on my X-Y and Z-axis and have also got the MESA card to talk to the chinese servo drives, this is looking promising. 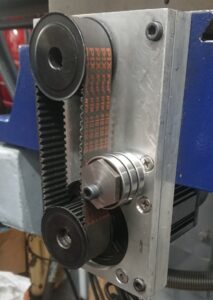
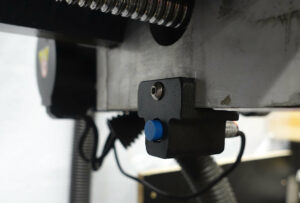
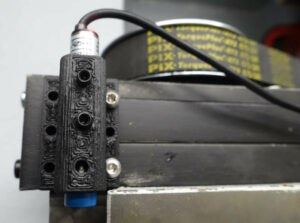
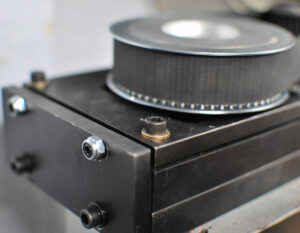
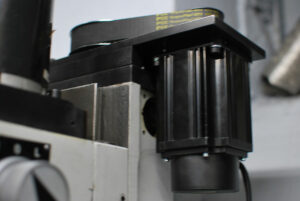
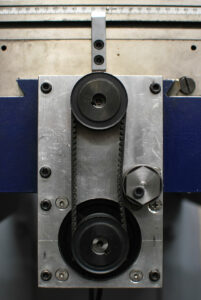
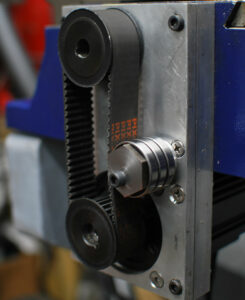
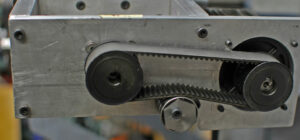
I decided to use belt transmission for AC servo to ball screw coupling to make my build more compact (having a limited space in my micro workshop).
This i how the Y-axis looks the X-axis is very similar but the Z-axis is geared down 2:1 to give it some more tourqe to lift the head. 25mm wide 5M belts are used for minimum backlash (close to zero). will post some more images later.
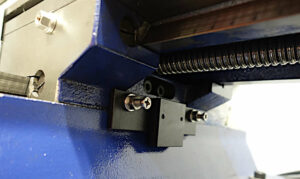
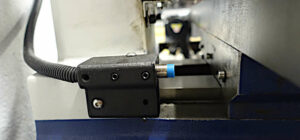
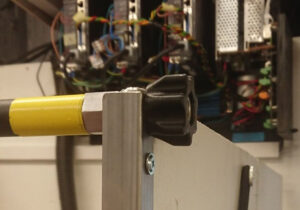
3D Printed Homing/Limit switch holders

 As you might know 3D printed CNC machines like PrintCNC have proven to actually work, however in this project I have choosen to use 3D printed parts only in parts that will live a life without mechanical stress.
Easy to adjust proximity sensor mount is such a part Printed in ASA-CF with M5 grub screws to lock the sensor in to possition and holders themselves attached to the machine with machine screws and double sided mounting tape (I´m satis with X-axis but will redesign Z and Y).
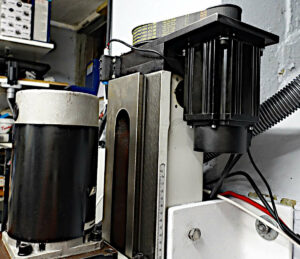
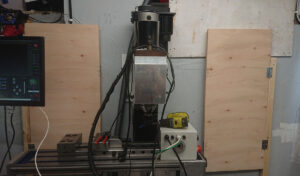
The Spindle
I will not leave any kind of comments or thoughts about the stock DC motor spindle that I got with the spindle at delivery and are still using (15 Dec 2024) I move on to the upcoming AC servo spindle drive instead.
I have just recently received a 1.8KW 3000rpm China AC Servo motor and driver that I plan to get to work and serve as a Spindle motor on this mill, my plan is to have a manually switchable (by belt moving) dual spindle speed range of 0-3000 rpm and 0-6000 rpm range where the first gear obviously will have more tourqe.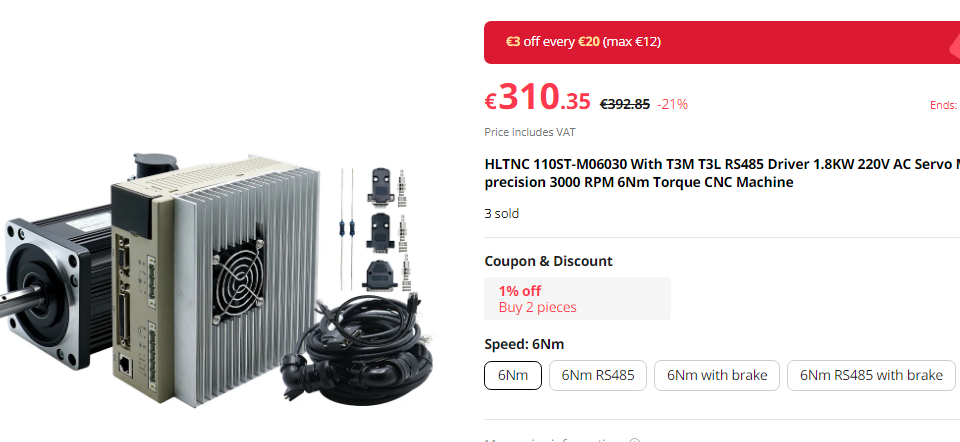
At the moment I have got this “spindle” motor to behave kind of nice with speed and direction controll on LinuxCNC 2.9.1 in step/dir mode together with the QT Dragon UI…. more to follow, might post ini and hal files when I’m confident haha ….
I have still not made any mounts and pulleys to be able to put this servo in to use as a spindle motor so I actually don’t know how it will work in reality but… verdict will follow.
-Right now I have made some progress in my cnc conversion project. the following steps are done-
- Ball screws installed (Dual nut screws).
- Base cut to extend Y-travel with about 50mm
- AC servo motors installed and tuned.
- Limit/homing switches istalled and rigged.
- Controll box is up and running but need some finnishing work and a cover.
- Tramming done.
-In the piplane to do-
- Fabricate and install a milling head spacer for better Y-axis work space for vices.
- AC Servo spindle motor with belt drive to be contructed and installed (1.8KW AC servo motor and drive on order, multi rib belts will be turned in house.
- Pneumatic actuated power drawbar with spring washers (will use threaded draw bar).
- AC servo motor and the pneumatic power drawbar might tempt me to try a new ATC concept ;)
- Tidy up installation and make some covers for the belt drives and servo motors.
- Chip controll and mist lube/cooling.
- Tool setter to be installed.
- 3D probe to be installed.
- Covers and chip controll solution not yet designed.
-Movie playlist-
First: Homing sequence, 2nd Surfacing simulation, 3rd Compact fold away CNC enclosure
-Image galleries-
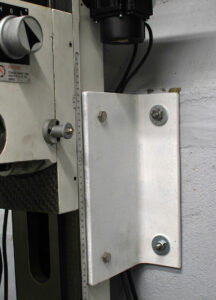
Some comments on first gallery: The brazes (white angle iron on the sides of the Z-axis colkumn) to the wall behind is a greate improvement of the stabiliy of this mill, I use oversized holes in all possitions to allow for clamping the collumn without implement any distorsion in the structure, the goole is to controll vibration the angle profile is 180x90x10mm and expandtion and column bolts are M10.
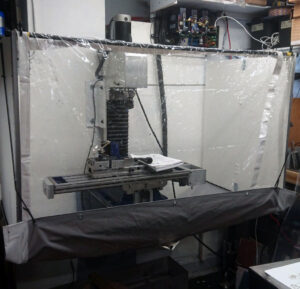
The 2nd image slider shows my compact living foldable CNC cabinet for chip control.

-Links and downloads-
English translation of Chinese A1-SVD Series Servo drivers user manual
My LinuxCNC config files for the HBM BF-30MVL “not really stock”.
-Aditional notes and comments-
According the A1-SVD 15 drives, I currently use the following settings including and part from delivery stock.
- Fn009 – 230 (Supply Voltage).
- Pn001 – Motor type (Check motor manual) I use “7” for my 750W AC servo motor.
- Pn002 – 2 (Step/Dir mode)
- Pn003 – 1 (Motor enable) enabled at power up.
- Pn098 – Encoder gearing, i use 5 for X and Y and 10 for Z since I use belt gearing 2:1 for Z And 1:1 for XY.
If you find something strange in those settings or my LinuxCNC config I would love to hear from you!