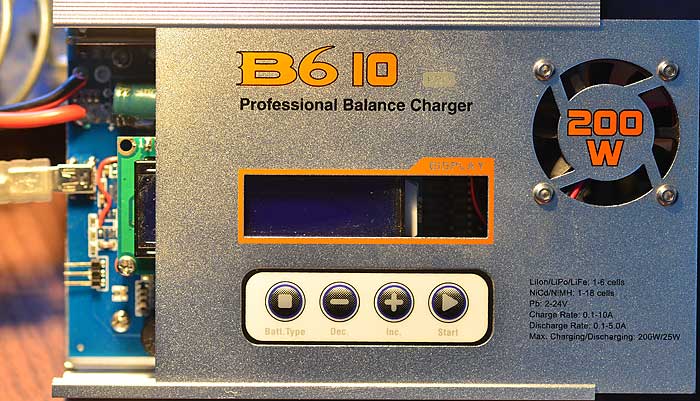
This writeup is about how I manage to get the USB PC interface enabled on a "Genuine Imax RC B610
Pro" that I bought from an Ebay store.
I bought the battery charger from an Ebay store that stated it as being equipped with a USB interface that could read display and save battery charging data.
The charger arrived and I found it to have a mini USB connector but no USB wire or software was included in the package, I contacted the company via Ebay but they couldn't or didn't want to help me with this matter, they just told me that the charger was coming from another supplier.
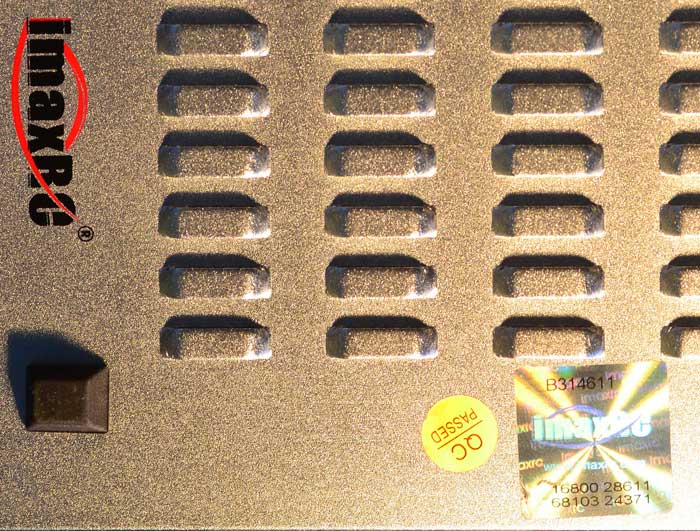
I started to investigate the problem by downloading a few battery charger monitoring applications that I found at various places on the Internet, but without success I also tried loads of different USB Uart drivers still without being able to communicate with the Imax RC B610 Pro charger that I up to now considered as genuine (Due to the hologram sticker and the fact that I could register the device with the serial number!).
Above: The holo sticker and a serial number that actually worked!
I gave up and opened up the charger and found that EUREKA the chip for the USB Uart was missing on the circuit board and now I wasn't surprised that it didn't work!
By searching the WWW i found out that the missing parts of the circuit was an CP2102 and a LM393.
The CP2102 is the actual UART (SERIAL to USB converter) and is the essential part to get the charger to communicate with your PC. The LM393 is a comparator and as far as I understand it is only needed if you care about temperature measuring.
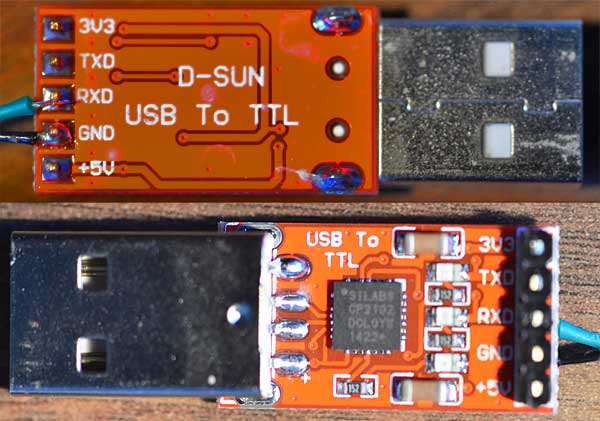
The CP2102 is a tiny surface mount chip that is hard to solder by hand so I went for a different option and bought a ready made CP2102 interface from YES Ebay again ;-)
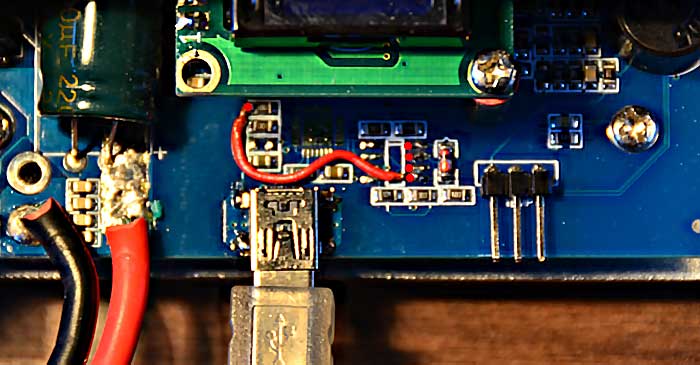
I now picked a USB cable with a mini connector and cut it at the PC end (Keeping the wire with the USB mini connector) then soldered the green wire to RXD and the black wire to GND on the USB To TTL board then I went back to my already open "Genuine" Imax RC B610Pro and soldered a jumper wire as shown on the image below.
Red jumper soldered to the last leg where the LM393 should have been. and then to the surface mount component right below the edge of the display board of the battery charger. Now just install the UART driver for the CP1202 and the Battery Monitoring software.
Then connect the Mini USB connector to the Imax RC B610
Pro charger and the UART connector to your PC, now go to the "Device manager" (Start/Control panel/Device manager) to find out if your UART is recognized. Also make a note of the COM port that has been assigned to your UART (image below).
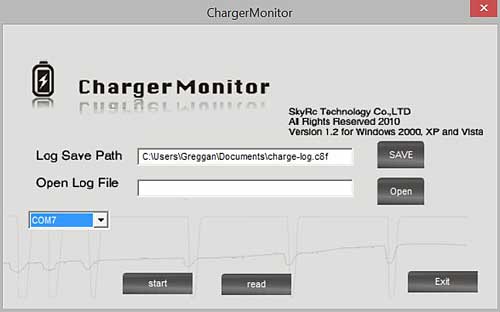
My USB uart was assigned port 7 and seams to work now I start the Charge Monitor software and gets the splash screen below.
- Click save and chose where to save your charging log and give it a name.
- Select the correct COM port (That you noted in the Device manager.
- Click on Start
When you click start you will get this image after a while and hopefully with a yellow connected indicator!
Yellow rectangle with connect, yes!
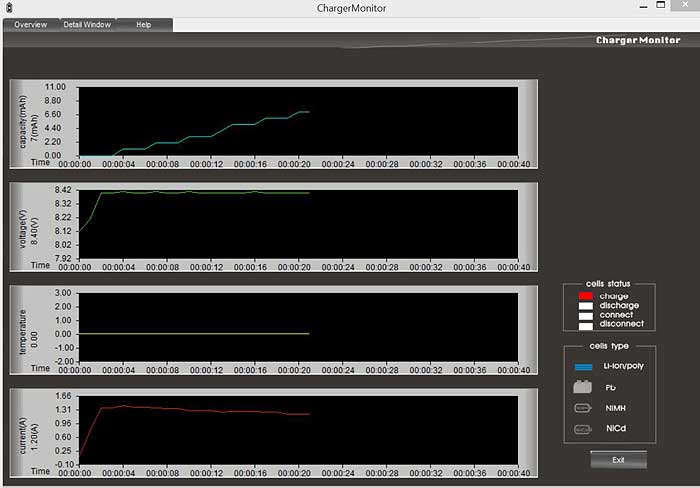
Now its time to operate the charger, the monitoring works both for the charging function and to monitor the discharging function of the Imax RC B610Pro (Useful to measure capacity of the batteries of course!).
This is how it looks during charging (My pack was nearly full when I connected it for this screenshot.)
Good luck or Buy a genuine charger from here-> [LIPO Chargers];-)
